
Saturday, 21 May 2011
DAY 9 - MAKE SOMETHING FROM YOUR BREAKFAST BEFORE EATING IT
Ah saturday mornign... going to the bakery and getting a fresh loaf and having it cut, then home to make breakfast. This time before I put the bread in the toaster I made a cut out on the bread of the viens of a leaf and then toasted the bread as normal - here's my effort:
 Time to make: 2 minutes!
DAY 8 - TRANSFORM AN OLD BOOK - DOES THIS MAKE ME A TEA LEAF?
I wish I'd read further in the book of daily tasks before having a clear out last weekend! So, into the study and I found an old Sales invoice book.
 Hard work to cut through the pages actually but love the effect! I thought I'd then see what I could do by using the cut out shapes also and ended up with a stylised bird:
 This reminded me of an advert I had seen in a Travel magazine I picked up last year in a Sri Lankan hotel so I went for a rummage:
 I cut out the logo part in a similar shape (well, ish!) of a leaf, and cut through so that the cut out showed leaves on treas - I wish I'd had a picture of a tea plantation to have showing in there which would have been more authentic. So should this post be entitled "TEA LEAF?"
Time to make both: 30 minutes


Time to make both: 30 minutes
Wednesday, 18 May 2011
DAY 7 - MAKE A STENCIL AND USE IT IN YOUR WORK
One week into the project today and task for today according to the 365 day project guru is to use a stencil in your work:

I've been carrying around the paper cutout stencil of a flower head (but to me it looks more like a bunch of eliptical shaped leaves arranged in a circle) that a lovely friend of mine has a paper punch for (unfortunately if doesn't work on fabric, we tried, best way to get this sort of finish on fabric items is by getting the fabric laser-cut, but this isn't necessarily a cheap option!
My intention of using it as insipration in a cushion design for our new range, but hadn't yet done anything with it, so this project is the ideal oppotunity.
Along with some offcuts of Italian Guipure Lace that we had used in another work project for a client recently, I thought I could draft up a few designs and play withe the cutout - here's a few ideas:
i) leaving the stencil whole but colouring it

ii) cutting the stencil into 4 and using is as a frame for the cushion

iii) as ii) above but adding lace leaves into the centre of the design.

Will add these designs to the sketchbook of inspiration - I'd really advise people to keep a log of any creative ideas and thought they have (and/or pictures they have cut out of a magazine) - its great to refer back to when you don't feel too inpspired!
Time spent - 30 mins
DAY 6 - LOOK IN THE KITCHEN AND WORK WITH FRUIT OR VEG YOU FIND
Quick post today, and a bit of a rushed job on the creativity front due to pressure of work today.
So, I decided to create a platter of leaf related things in the kitchen. Firstly I got out one of my Colclough Ivy Leaf Platters and created a "meal" with the heart from some spring greens garnished with a Bay leaf, some wilted spinach, jelly cherries, and some beautifully coloured marbled kaffir Lime leaves, all garnished with some freeze dried chives:
 Time to complete: 10 minutes
So, I decided to create a platter of leaf related things in the kitchen. Firstly I got out one of my Colclough Ivy Leaf Platters and created a "meal" with the heart from some spring greens garnished with a Bay leaf, some wilted spinach, jelly cherries, and some beautifully coloured marbled kaffir Lime leaves, all garnished with some freeze dried chives:

DAY 5 - WORK WITH A COLLECTION OF YOUR OBJECTS
Busy day today, trying to finalise which fabric samples to take to a client meeting for a really challenging window trreatment. One the way back to the studio I realised that the amount of fabric samples in our library effectively are a collection in themselves so i should perhaps use the fabric samples to make my leaf inspired item today! But, what to do with them, bearing in mind it was a really hectic day?
The solution soon came to me when I needed to transfer a large amount of data onto my ZIP drive, which I don't have a case for
 I decided that a quilted fabric would be best, to give a bit of padding, so I settled for this Robert Allen silk fabric with a leaf design - and the fabric sample was exactly the right size for a nice snug zip drive case!

Time to make - 15 minutes
The solution soon came to me when I needed to transfer a large amount of data onto my ZIP drive, which I don't have a case for


Time to make - 15 minutes
Monday, 16 May 2011
DAY 4 - TAKE A WALK AND MAKE SOMETHING WITH WHAT'S AVAILABLE
An intereesting topic today - I knew it was going to be difficult to find the time to take a walk today with a hectic day of meetings and things in the office so I thought i'd do this after work tonight.
However, on a (very mini) walk out to my car and the rubbish/recycling bins at 6am this mornign I noticed the leaves on the Ecover Washing Liquid bottle sat in my recycling box (although this is a pic of the new one in the kitchen as I'd cut the other one up before photographing it!)

What could I do with the leaves? how about cutting them out and making earings out of them by placing them on a pair of existing white sapphire stud earings?
At work in the studio, we quite often design interiors combining the old with the new - so how about one of the oldest materials around, mixed with a 20th century material for an earring?!
 I can't believe how good they look, so I left them in for a while today and have had loads of comments about them being really nice - and when people realised what they were made from they were really surprised and thought they must have cost me a fortune!
 Now ideally I need to wait till the next bottle is empty and make another 2 so that I have even sized leaves! (Wonder if they would go with my dress for the Ball I'm going to at the weekend?)
Time to make - 20 minutes
However, on a (very mini) walk out to my car and the rubbish/recycling bins at 6am this mornign I noticed the leaves on the Ecover Washing Liquid bottle sat in my recycling box (although this is a pic of the new one in the kitchen as I'd cut the other one up before photographing it!)

What could I do with the leaves? how about cutting them out and making earings out of them by placing them on a pair of existing white sapphire stud earings?
At work in the studio, we quite often design interiors combining the old with the new - so how about one of the oldest materials around, mixed with a 20th century material for an earring?!


Time to make - 20 minutes
Sunday, 15 May 2011
DAY 3 - USE PAPER, NO GLUE, NO PENS, NO SCISSORS - omg!
What an interesting challenge today - My first thought was to make some tear out shapes from a newspaper that looked like leaves but they were all a disaster!
So onto the web to look at origami. Its been about 25 years since I've done any of this, but I thought I could try and pick this up again - can't be too difficult can it? Well, I couldn't have been more wrong...
I love really different shapes and found a picture of a Kids Origami Christmas Leaf that I thought it might be nice to follow however, when I clicked onto the instructions it was a video which was so fast and contained no instructions so that quickly became mission implausible - memo to self - this is for Kids of brain surgeons and rocket scientists only I fear!
Then, I found a link to instructions for my all time favorite Ginko Leaf.
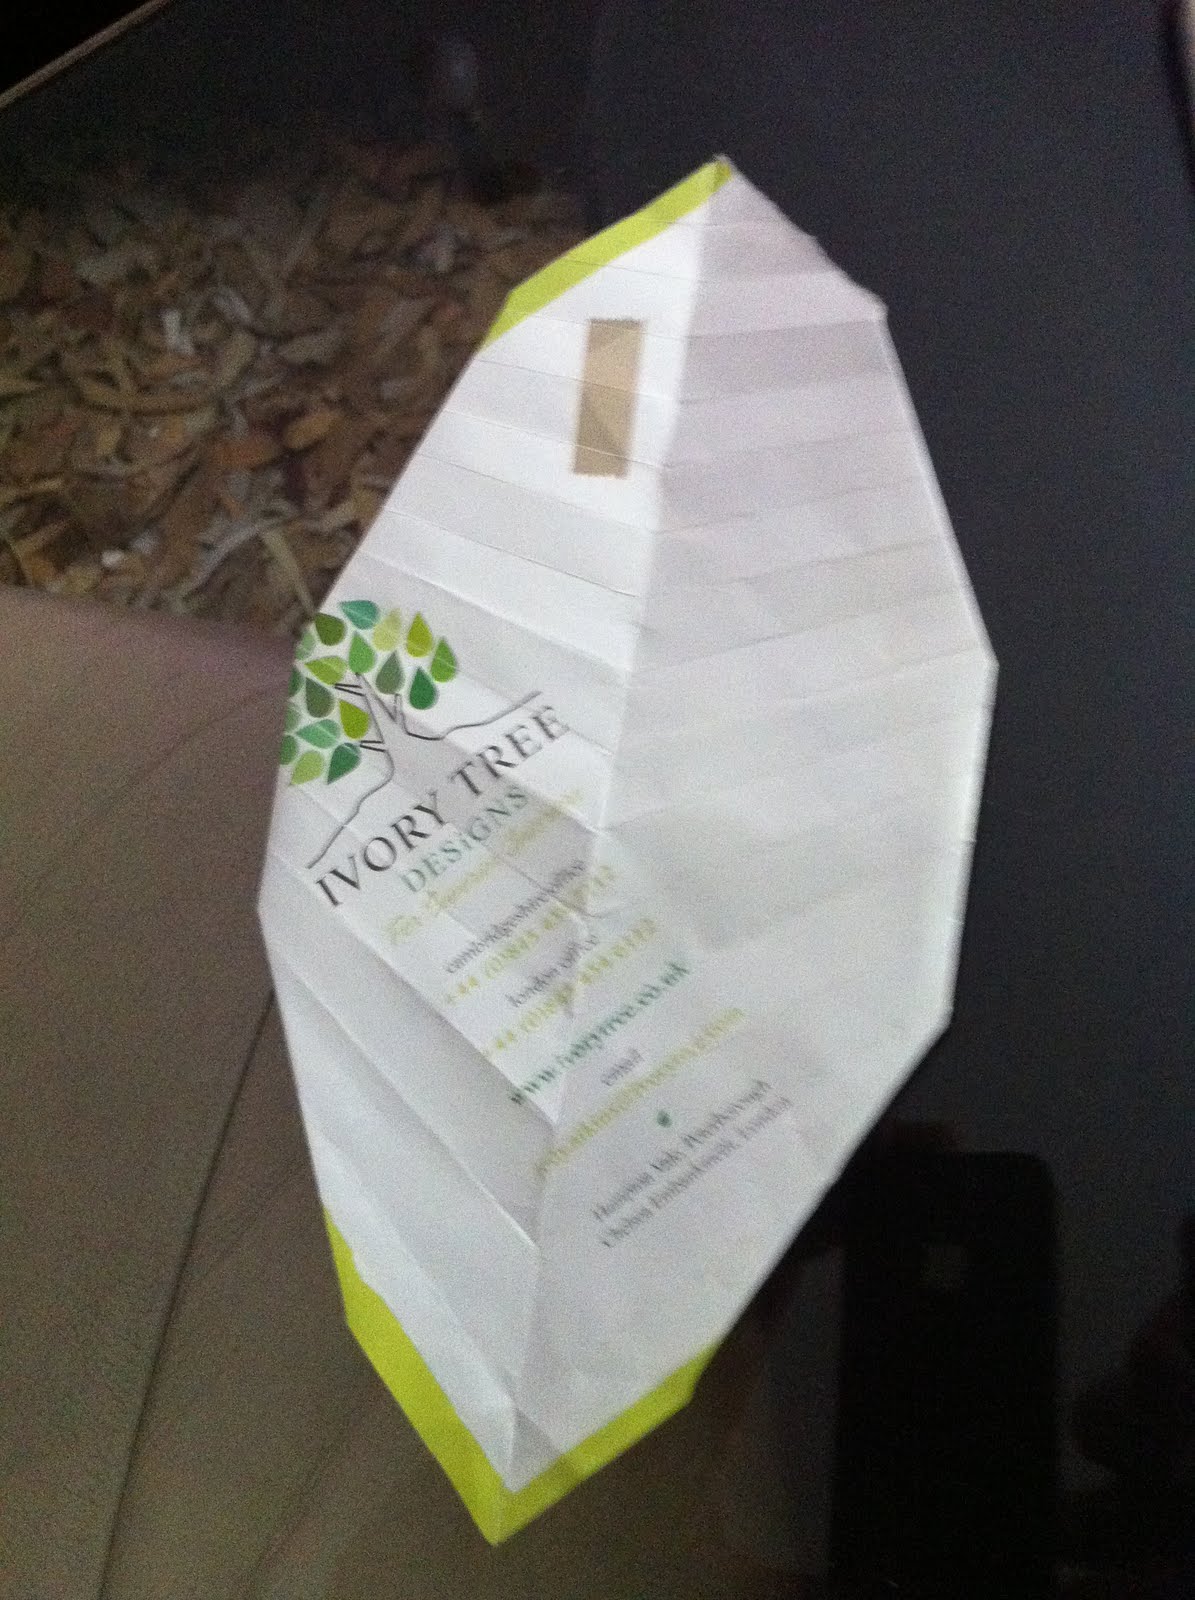
- How the devil do you get your square in picture 10 to look like picture 11!!! AAAAGGGGGHHHHH! So this one was my Mission impossible! Here's where I got to (using some of my old "leaflets" as paper, a slightly ironic twist I thought!)

 A couple of quick turning over of the corners however did produce an initial leaf of sorts - complete with all the veins! More looking online, only to discover that my leaf effort above is exactly the same as another set of origami instrictions so it does count - YIPPEE!
So I thought I'd try something a little more complex - I found a 10 minute video on how to make a maple leaf - Well I made a windmill before I lost the plot, does that count? And it would have looked so good out of a remnant of Zoffany Mosaic Wallpaper in Bronze that I've used in my Lounge - a perfect dried out, textured leaf pattern!
Anyway - heres the wallpaper remnant so you can see the glorious texture (with lots of folds in it!) and my windmill!


At this point, after an hour and a half of playing (which I have thoroughly enjoyed, although it wasn't as successful as I'd hoped) I am going to call it a day on this project.
If any of you are more successful (even if you are kids!) please do share your results!
So onto the web to look at origami. Its been about 25 years since I've done any of this, but I thought I could try and pick this up again - can't be too difficult can it? Well, I couldn't have been more wrong...
I love really different shapes and found a picture of a Kids Origami Christmas Leaf that I thought it might be nice to follow however, when I clicked onto the instructions it was a video which was so fast and contained no instructions so that quickly became mission implausible - memo to self - this is for Kids of brain surgeons and rocket scientists only I fear!
Then, I found a link to instructions for my all time favorite Ginko Leaf.
- How the devil do you get your square in picture 10 to look like picture 11!!! AAAAGGGGGHHHHH! So this one was my Mission impossible! Here's where I got to (using some of my old "leaflets" as paper, a slightly ironic twist I thought!)

So I thought I'd try something a little more complex - I found a 10 minute video on how to make a maple leaf - Well I made a windmill before I lost the plot, does that count? And it would have looked so good out of a remnant of Zoffany Mosaic Wallpaper in Bronze that I've used in my Lounge - a perfect dried out, textured leaf pattern!
Anyway - heres the wallpaper remnant so you can see the glorious texture (with lots of folds in it!) and my windmill!


At this point, after an hour and a half of playing (which I have thoroughly enjoyed, although it wasn't as successful as I'd hoped) I am going to call it a day on this project.
If any of you are more successful (even if you are kids!) please do share your results!
Saturday, 14 May 2011
DAY 2 - BE INSPIRED BY THE ANIMAL KINGDOM (ii)

So heres the finished result - I've taken a swatch of Swaffer Peonies fabric, and cut off a separate leaf from another part in the design to create a leaf-mimic creature from it. I've also used some Goldwork techniques using Copper Passing thread for the insect legs and antennae - I learned these last week on a Royal School of Needlework Course at Hampton Court Palace. I was so lucky to have been taught by Helen McCook, one of the lovely ladies who worked on "The Dress" for the Royal wedding 2 weeks ago. The ladies who made the dress have studied for years and are real experts on some of the dying traditional crafts. I can throughly recommend the courses to all though!
Time Taken - 1 hour approx
DAY 2 - BE INSPIRED BY THE ANIMAL KINGDOM (i)
Day 2, and I have to make something inspired by my favorite animal -the first things that came to mind thinking animal and leaf were Stick insects and Koalas (must be my aussie roots) Unfortunately I don't have a Eucalyptus tree in my garden (a Koalas natural habitat) so really need to put my thinking cap on...


So now to make my Day 2 creation...
Friday, 13 May 2011
DAY 1 - MAKE SOMETHING THAT FITS IN THE PALM OF YOUR HAND

Day 1's project was to start small with something that would fit in the palm of my hand using only materials from my immediate environment.
So, I went out into the garden and picked some leaves to make a flower solely from leaves (OK with 3 berries also in the centre!). I loved the fact that even thought its late spring/early summer (we;ve been so lucky with the weather)there are loads of autumnal coloured leaves in my garden, with so many different sizes and shapes. They are just held together with some sewing cotton thread would round the leaves
Time to make - 15 minutes!
Subscribe to:
Comments (Atom)
